The Ultimate Peach Crisp: Unveiling the Secrets to a Perfectly Crunchy Topping
There's a certain magic that emanates from a warm, bubbling peach crisp, filling the kitchen with an aroma that instantly transports you to sun-drenched summer days and cherished family memories. For many, it evokes the image of a grandmother's kitchen, where the scent of baking fruit, cinnamon, and brown sugar promised an unforgettable treat. This isn't just any dessert; it's a nostalgic journey, a symphony of tender, juicy peaches nestled beneath a delightfully crunchy, buttery topping.
For years, home bakers have been on a quest to replicate that elusive "perfect bite" – the one where the fruit is sweet and yielding, and the topping delivers an unparalleled crunch without a hint of sogginess. After countless experiments with flour-to-oat ratios, sugar blends, and spice combinations, we've finally distilled the essence of a truly exceptional peach crisp. This article is your comprehensive guide to crafting the ultimate peach crisp recipe, a culmination of insider tips, tested tricks, and a genuine love for this quintessential summer dessert. If you're ready to capture the very taste of sunshine and create a dessert that will impress and delight, you've come to the right place.
The Foundation: Choosing Your Peaches Wisely
The heart and soul of any outstanding peach crisp, naturally, lies in the quality of the peaches themselves. This is where the magic truly begins. For the absolute best flavor and texture, prioritize ripe, but not overly soft, freestone peaches. Freestone varieties are a baker's dream because their pits separate effortlessly from the flesh, making slicing and preparation a breeze. While clingstone peaches are delicious, their stubbornly attached pits can make them more challenging to work with for a recipe requiring neat slices.
When selecting fresh peaches, give them a gentle squeeze; they should yield slightly to pressure, indicating optimal ripeness. Avoid peaches that are too firm, as they'll likely be tart and may not soften sufficiently during baking. Conversely, steer clear of any that feel mushy or exhibit visible bruises, as these can lead to a watery, unpleasant filling. The aroma is also a fantastic indicator: ripe peaches will exude a sweet, fragrant perfume. Take a good whiff – the stronger and sweeter the scent, the better! For those times when fresh peaches aren't in season or readily available, remember that this Easy Peach Crisp: Fresh, Frozen, or Canned Peaches for All recipe highlights how you can still achieve a fantastic result. If using frozen, thaw them and drain any excess liquid. For canned peaches, simply drain thoroughly before using.
Preparing Your Peaches for Perfection
Once you've chosen your peaches, proper preparation ensures the best possible texture and flavor in your crisp. For fresh peaches, many prefer to peel them, as the skins can become tough during baking. A simple method is to blanch them: briefly immerse peaches in boiling water for 30-60 seconds, then immediately transfer them to an ice bath. The skins will then slip off easily. After peeling (if desired) and removing the pit, slice your peaches into uniform wedges or chunks. Aim for about 1/2 to 3/4-inch thick slices, ensuring they cook evenly.
For the filling, a delicate balance of sweetness and a hint of tartness is key. Combine your prepared peaches with a touch of sugar (adjusting based on the natural sweetness of your fruit), a squeeze of fresh lemon juice (which brightens the flavor and helps prevent browning), and a thickener like cornstarch or flour. The thickener is crucial for achieving that luscious, slightly viscous fruit layer that holds its shape beautifully rather than becoming a watery mess. A pinch of warm spices like cinnamon and nutmeg will further enhance the peaches' natural sweetness, creating a truly irresistible base for your crunchy topping.
Unlocking the Secret to a Perfectly Crunchy Topping
The topping is arguably the star of the show when it comes to a peach crisp, especially one aiming for that ultimate crunch. This isn't just any brown sugar oat topping; it's engineered for maximum texture and flavor. The harmony of ingredients and the method of their combination are paramount to preventing a soggy disaster and achieving that golden, crisp perfection.
Here’s what goes into an exceptional crunchy topping and how to master it:
- Rolled Oats (Old-Fashioned): These are non-negotiable. Rolled oats provide a wonderful chewiness and structure that quick oats simply can't replicate. They absorb moisture, caramelize beautifully, and contribute significantly to the desired texture.
- All-Purpose Flour: Acts as a binder and helps create a structural crumb. It balances the oats and helps the topping brown evenly.
- Brown Sugar: We prefer light or dark brown sugar over granulated sugar for its molasses content. This not only adds a deeper, more caramel-like flavor but also contributes to a richer color and a chewier, more complex crunch.
- Unsalted Butter: The fat component. We highly recommend using cold butter, cut into small cubes. This is perhaps the most critical secret.
- Spices: Cinnamon is a classic, complementing peaches perfectly. A touch of nutmeg or even a tiny pinch of cardamom can add layers of warmth and sophistication.
- A Pinch of Salt: Don't skip this! Salt enhances all the other flavors, making the topping taste even richer and sweeter.
The Art of Combining for Maximum Crunch
Forget melted butter for this topping. The true secret to preventing sogginess and maximizing crunch lies in the "cut-in" method, similar to making pie crust or biscuits. Here’s why and how:
- Combine Dry Ingredients: In a medium bowl, whisk together the rolled oats, flour, brown sugar, spices, and salt. Ensure they are well combined.
- Cut in Cold Butter: Add the cold, cubed butter to the dry mixture. Using your fingertips, a pastry blender, or two knives, quickly work the butter into the dry ingredients until the mixture resembles coarse crumbs with some pea-sized pieces of butter remaining. The key here is to handle the butter as little as possible to keep it cold.
- Why Cold Butter? As the crisp bakes, these tiny pockets of cold butter slowly melt, creating steam that separates the flour and oat particles. This process results in a lighter, flakier, and ultimately crunchier topping. If you use melted butter, the topping can become dense and greasy, losing its delightful texture.
- Optional Additions: For an extra layer of crunch and flavor, consider adding chopped nuts like pecans or walnuts to your topping mixture. This adds a delightful textural contrast and nutty richness.
Once your topping is prepared, you can even chill it in the refrigerator for 15-30 minutes before baking. This helps ensure the butter remains cold, further enhancing the crisp's final texture.
Assembling and Baking Your Ultimate Peach Crisp
With your perfectly prepared peaches and your meticulously crafted crunchy topping, assembly is straightforward. Lightly grease your baking dish (a 9x13-inch pan is ideal for most recipes, but an 8x8-inch works for smaller batches). Spread your peach filling evenly across the bottom of the dish. Then, generously sprinkle the crumbly topping over the peaches, ensuring an even layer. Resist the urge to press the topping down too firmly, as this can inhibit air circulation and prevent optimal crisping.
Bake your peach crisp in a preheated oven, typically around 375°F (190°C), until the topping is deeply golden brown and the fruit filling is bubbling merrily around the edges – a sure sign that the peaches are tender and fully cooked. This usually takes about 35-50 minutes, depending on your oven and the depth of your crisp. If the topping starts to brown too quickly, you can loosely tent it with foil. Once out of the oven, allow the crisp to rest for at least 15-20 minutes before serving. This crucial resting period allows the fruit filling to set slightly, preventing it from being too runny and ensuring each scoop holds its shape beautifully.
Tips for Serving and Customizing Your Dessert
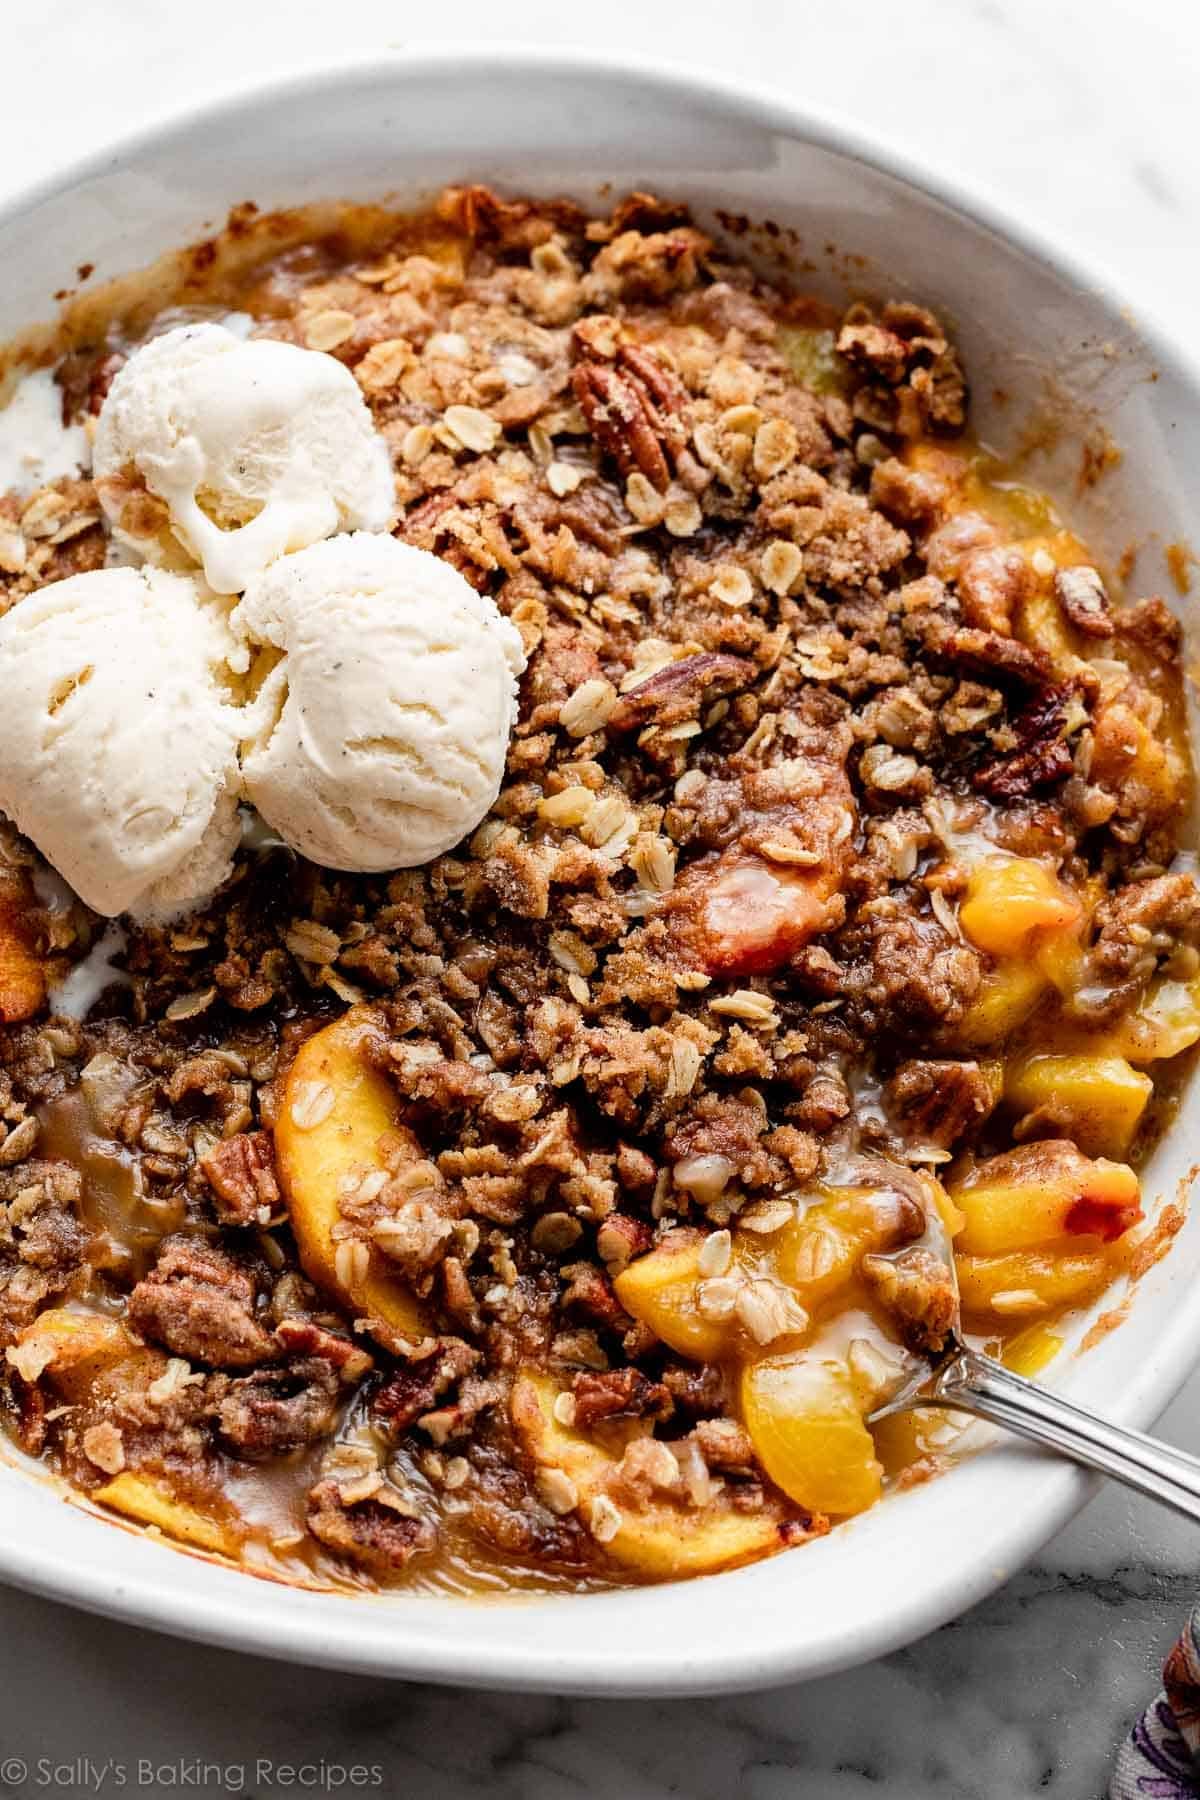
The ultimate peach crisp is a versatile dessert that shines on its own but also welcomes companions. The classic pairing, of course, is a generous scoop of cold vanilla bean ice cream, which slowly melts into the warm, spiced fruit, creating an irresistible marriage of temperatures and textures. Other delightful accompaniments include a dollop of freshly whipped cream, a spoonful of tangy crème fraîche, or even a drizzle of homemade caramel sauce for an extra touch of decadence.
For those seeking to explore variations, consider adding a handful of fresh berries (raspberries or blueberries work wonderfully) to your peach filling for an extra burst of flavor and color. A hint of bourbon or almond extract in the fruit mixture can also add a sophisticated depth. And if you're keen on capturing that truly authentic, comforting feel, you might find more inspiration in Grandma's Best: Crafting an Old-Fashioned Peach Crisp Recipe, which delves into the timeless traditions of this beloved dessert.
Leftover peach crisp can be stored at room temperature for a day or two, covered, or refrigerated for up to 3-4 days. To reheat, simply warm individual servings in the microwave or place the entire dish back in a moderate oven until heated through and the topping regains some of its crunch.
Conclusion
Crafting the perfect peach crisp recipe is a journey that celebrates fresh, seasonal ingredients and the joy of home baking. By understanding the nuances of peach selection, appreciating the science behind a truly crunchy topping, and paying attention to a few key techniques, you can elevate this beloved summer dessert from good to truly extraordinary. The harmonious blend of sweet, tender peaches and a gloriously crisp, buttery oat topping is a culinary triumph that promises pure comfort and unadulterated happiness in every bite. So, roll up your sleeves, gather your ingredients, and get ready to create a peach crisp that will undoubtedly become a cherished recipe in your own kitchen.
